Connect Watchlist to Scanner
Why Connect a Watchlist to the Scanner?
The Live Scanner monitors 600+ symbols with a 2-second refresh rate, detecting opening range breakouts across 5-minute, 15-minute, and 30-minute timeframes. That’s a lot of data. Connecting your watchlist to the scanner lets you filter this down to only the symbols you care about.
Instead of scanning the entire market, you can focus the scanner on your pre-selected stocks. This is useful when you:
- Trade a specific sector or group of stocks
- Have a pre-market list of symbols showing strong setups
- Want to track symbols from your backtesting research
- Prefer a smaller, more manageable list during market hours
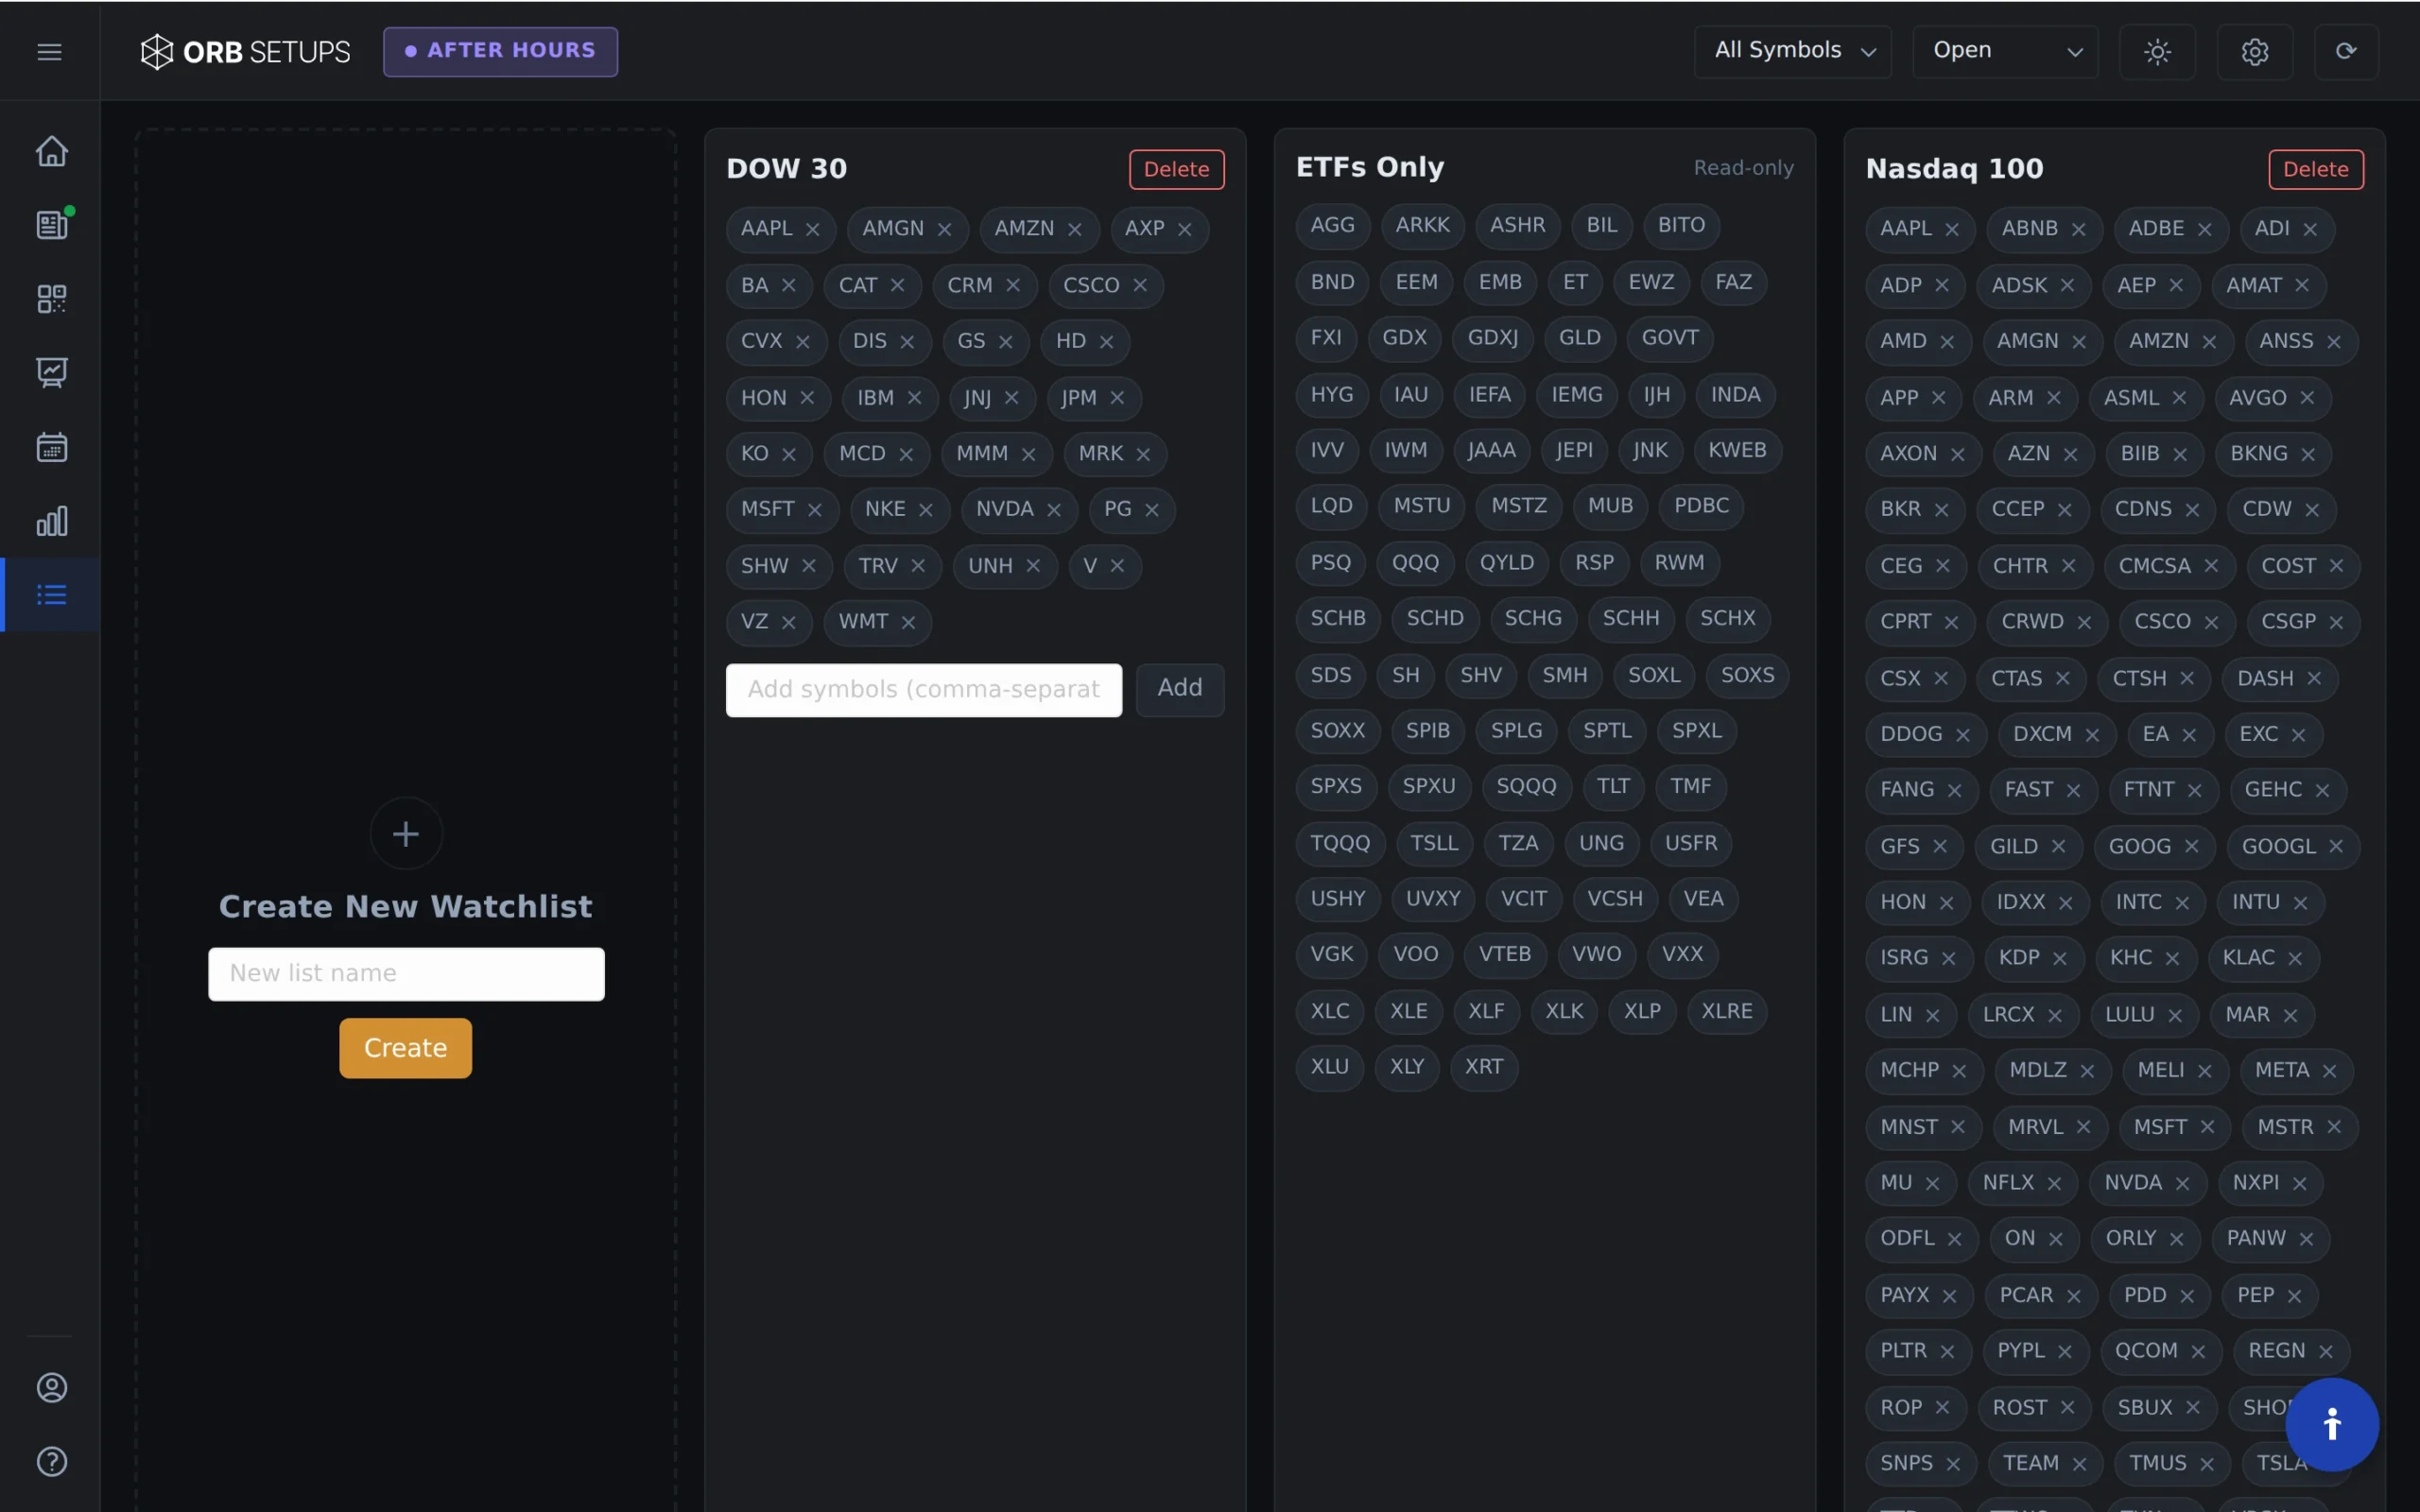
Step 1: Create or Load Your Watchlist
Before connecting a watchlist to the scanner, you need to have one ready. Navigate to the Watchlist tab in the main navigation menu.
From here, you can:
- Create a new watchlist and add symbols manually
- Load an existing watchlist you’ve already saved
- Import symbols from a CSV file
You can create unlimited watchlists with unlimited symbols in each one. There are no restrictions on how you organize your symbols.
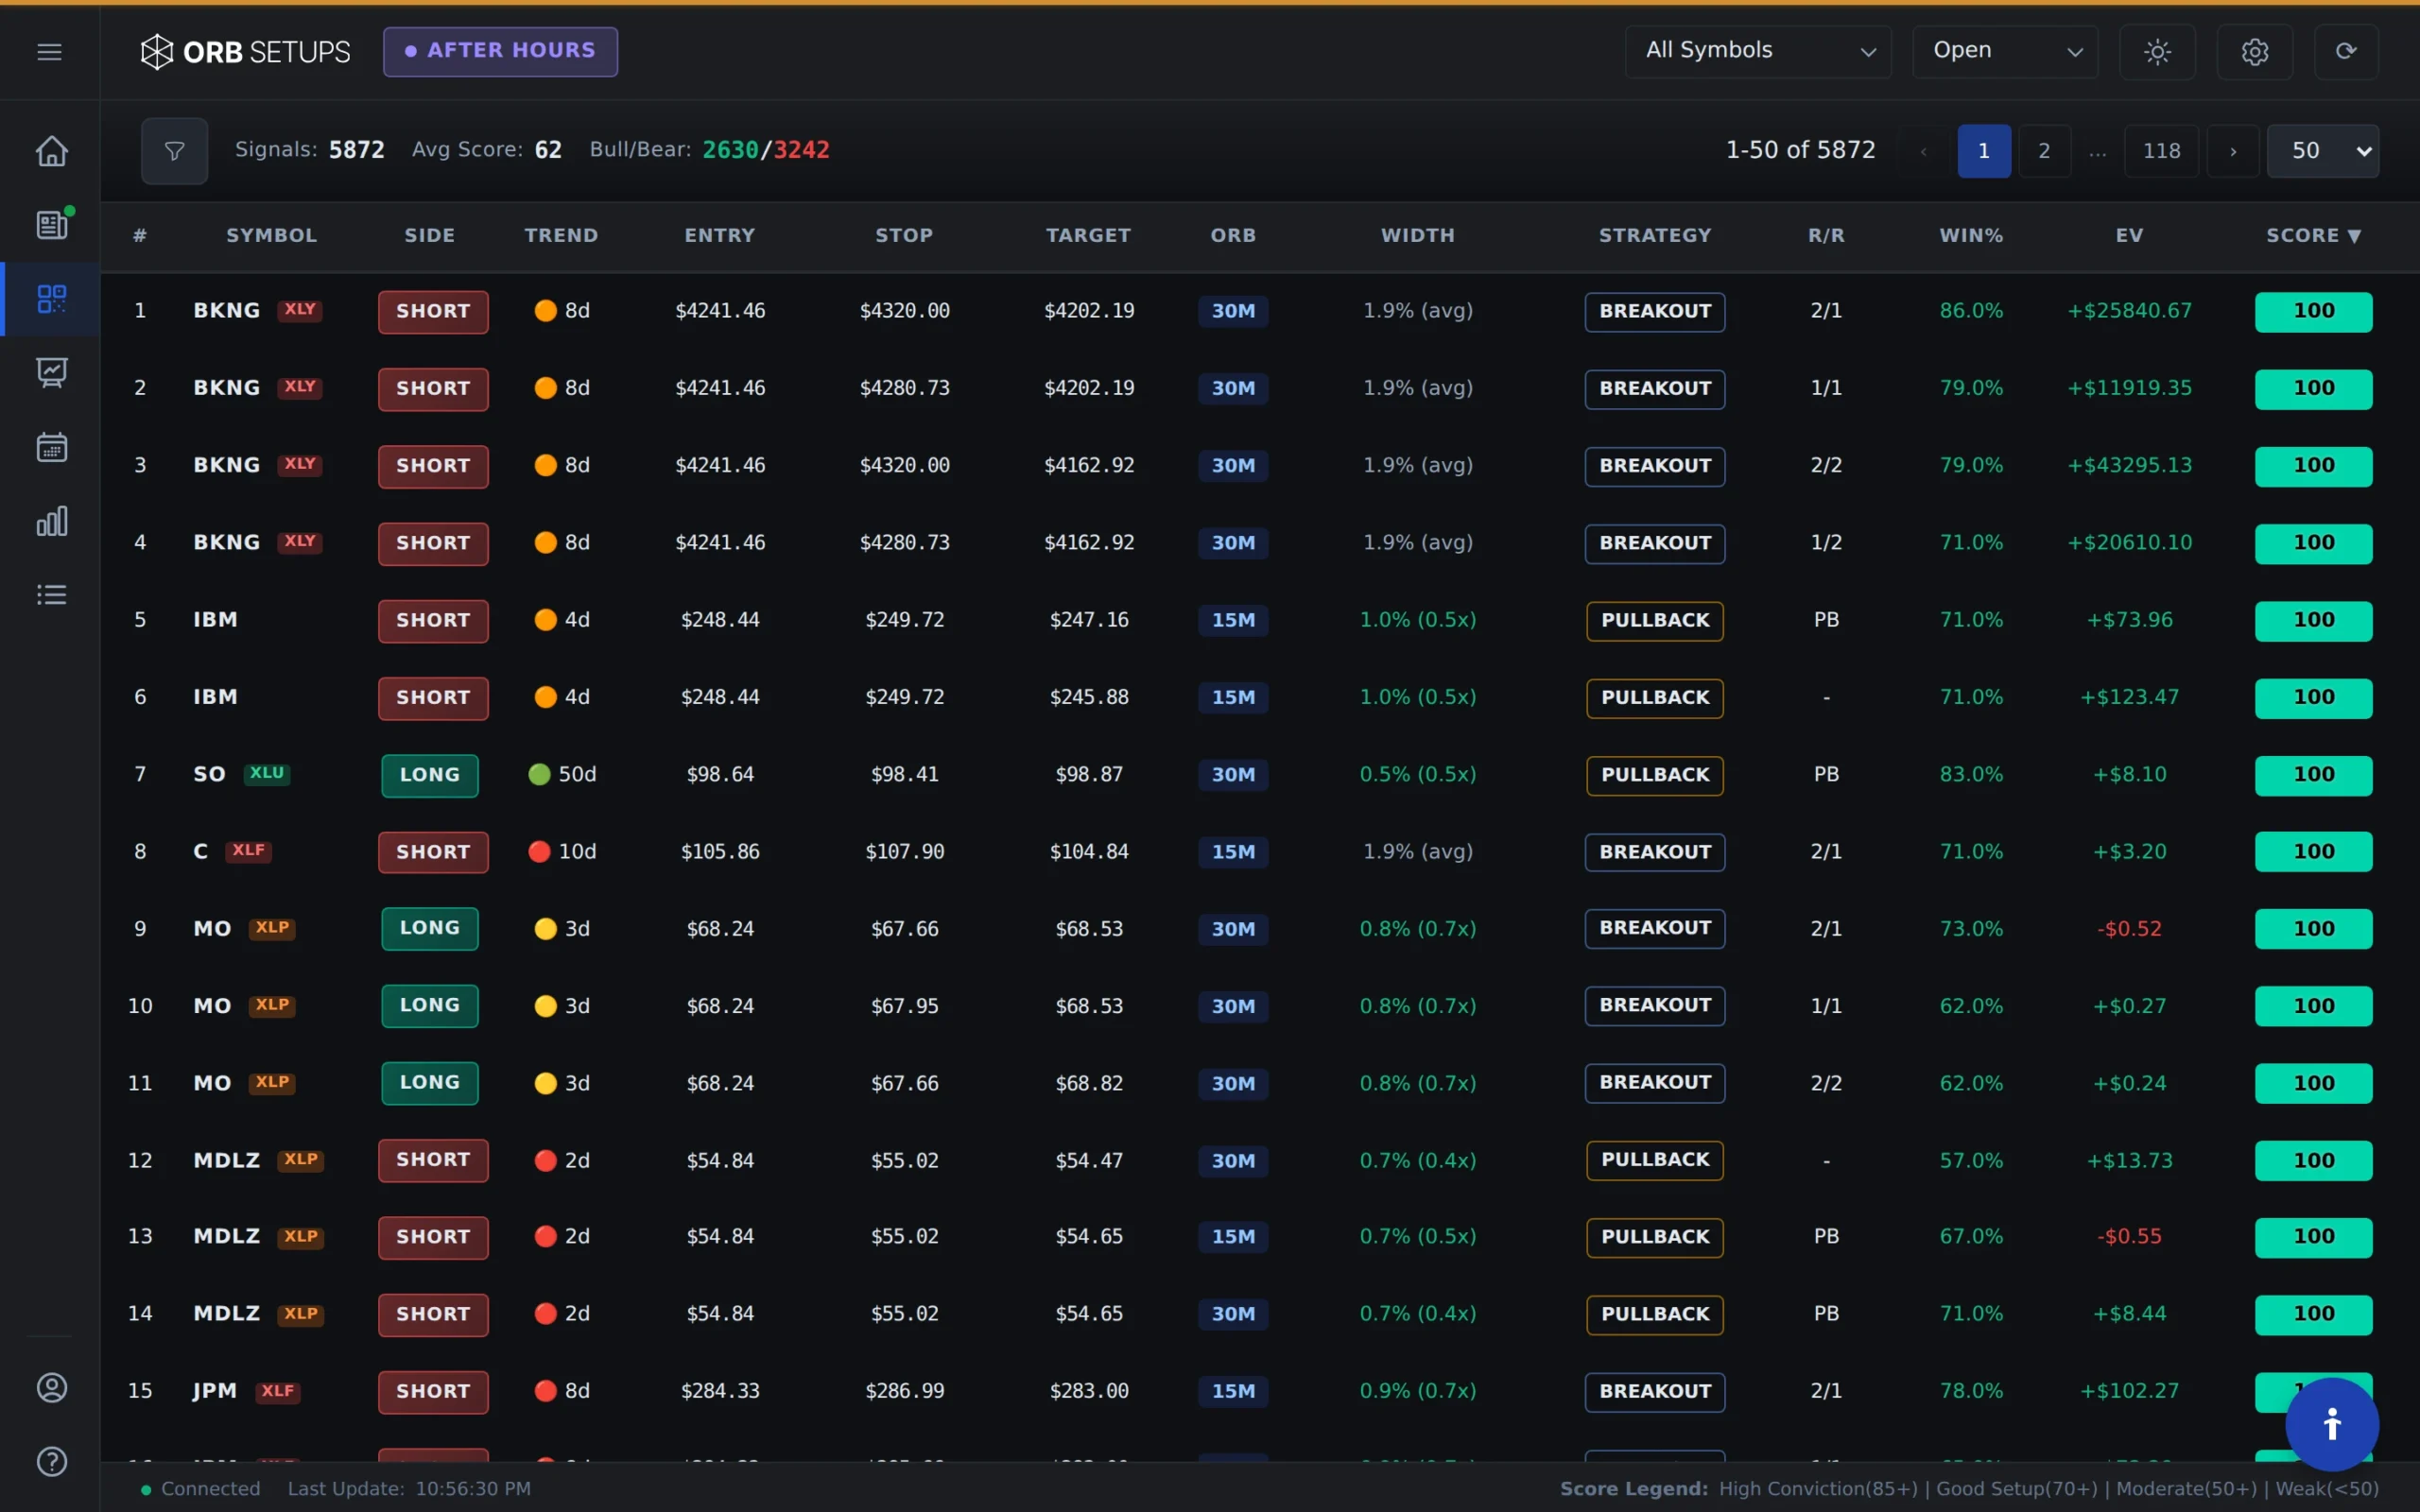
Step 2: Open the Live Scanner
With your watchlist loaded, click on the Live Scanner tab. The scanner displays real-time ORB setups as they trigger, updating every 2 seconds during market hours.
By default, the scanner monitors all 600+ symbols in the database. To narrow this down to your watchlist, you’ll use the Symbol List dropdown.
Step 3: Select Your Watchlist in the Scanner
In the Live Scanner, locate the Symbol List dropdown menu. Click on it and select Watchlist from the available options.
The scanner will immediately filter to show only symbols from your loaded watchlist. Any ORB setups that trigger on those symbols will appear in the results table.
You can switch between your watchlist and the full symbol list at any time. The dropdown gives you quick access to toggle your scan scope.
What Happens When You Scan a Watchlist
When the scanner is connected to your watchlist:
- Only watchlist symbols are monitored for opening range breakouts
- Results update every 2 seconds during market hours
- All timeframes remain available (5-min, 15-min, 30-min ORB)
- Historical backtest data is still shown for each setup, pulled from 150,000+ historical setups
The scanner applies the same detection logic whether you’re scanning 10 symbols or 600. The only difference is the scope of what gets monitored.
Tips for Using Watchlists with the Scanner
Build Watchlists Based on Your Strategy
Create separate watchlists for different trading approaches. You might have one watchlist for high-volume large caps, another for momentum stocks, and a third for ETFs. Switch between them as market conditions change.
Use Backtester Results to Build Watchlists
Run backtests to identify which symbols have historically performed well with ORB setups. Add those symbols to a dedicated watchlist, then scan only that list during live trading. This keeps your focus on symbols with proven historical edge.
Update Watchlists Regularly
Markets change. Review your watchlists periodically to remove symbols that no longer fit your criteria and add new ones that do. The scanner is only as useful as the symbols you give it.
Keep Watchlists Focused
More symbols means more noise. If you find yourself overwhelmed by scanner results, reduce your watchlist size. A focused list of 20 to 30 high-quality symbols often produces better results than scanning hundreds.